Plugins that remove repetitive drafting work inside your BIM software. Numbering, offsets, tags and tray systems.ปลั๊กอินที่ช่วยลดงานเขียนแบบซ้ำๆ ในโปรแกรม BIM: ใส่เลขรหัส, เบี่ยงราง, วาง Tag และสร้างระบบ Cable Tray
[0.001] boot SUPER_BIM.sys ........ OK
[0.014] mount /tools ............ OK
[0.042] scan registry ........... 05 pkgs
[0.067] host adapter: REVIT ..... READY
[0.101] license service ......... PENDING
[0.118] checkout ................ NOT WIRED
[0.130] listening on :443 ....... OK
____ ___ __ __
| __ )_ _| \/ |
| _ \| || |\/| |
| |_) | || | | |
|____/___|_| |_|
> _
METRIC_A // AVAILABLE_NOWพร้อมให้ทดลอง (จาก 5)
01
METRIC_B // HOST_APPโปรแกรมที่รองรับ
REVIT
METRIC_C // PACKAGEรูปแบบไฟล์
.ZIP
METRIC_D // PRICEราคา
TBD
รอประกาศ
03_TOOLS // PACKAGE_INDEX
Tools
เครื่องมือทั้งหมด
[05] PACKAGES · 01 AVAILABLE
Auto_Cable
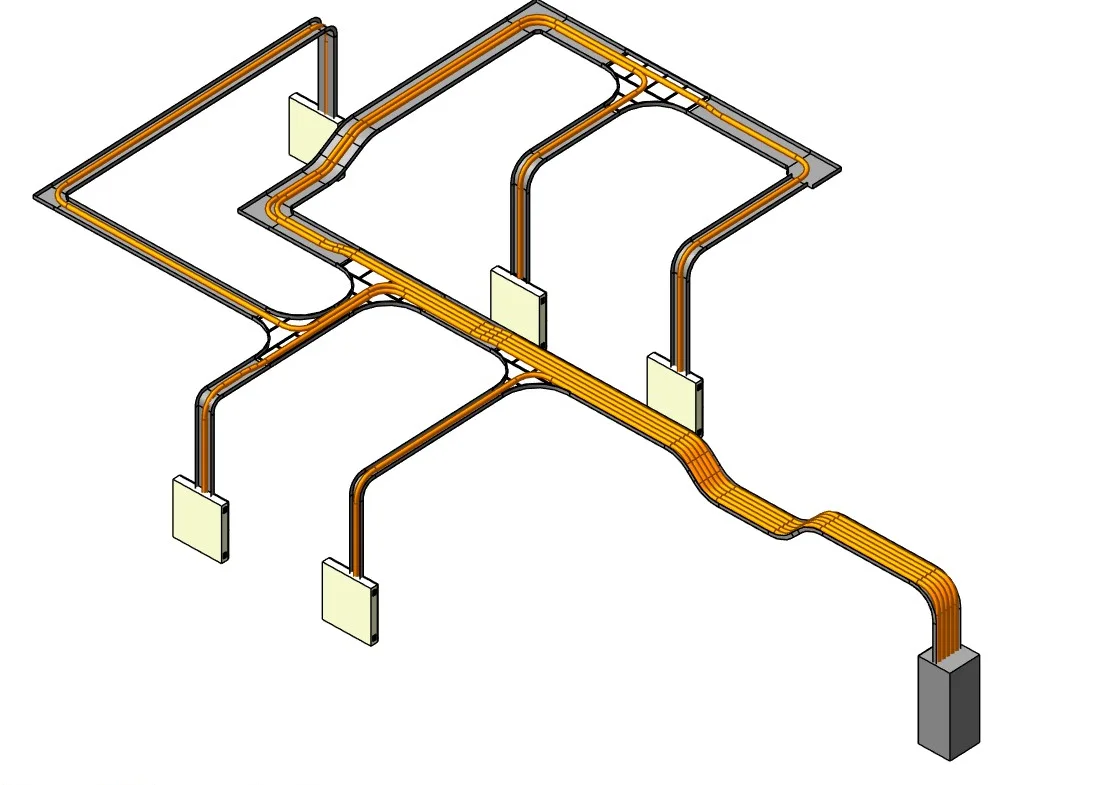
Lay conduit along cable trays to many destinations in one go. Click the source, pick the ends, create every route at once. Set conduit count, size, spacing and alignment; bends and branches are placed for you.
Place and line up tags like a drafter would: leaders that never cross, columns on any side, or copy a sample tag.
วาง Tag และจัดแถวให้เป็นระเบียบเหมือนคนจัด เส้นนำไม่ตัดกัน จัดเป็นคอลัมน์ หรือทำซ้ำตาม Tag ตัวอย่าง
SOONเร็วๆ นี้
AUTO_CABLE // HOW_IT_WORKS
How it works
Auto Cable ทำงานอย่างไร และได้ผลลัพธ์อะไร
3 STEPS · 1 RUN
01 // PICK_SOURCE
Click the source
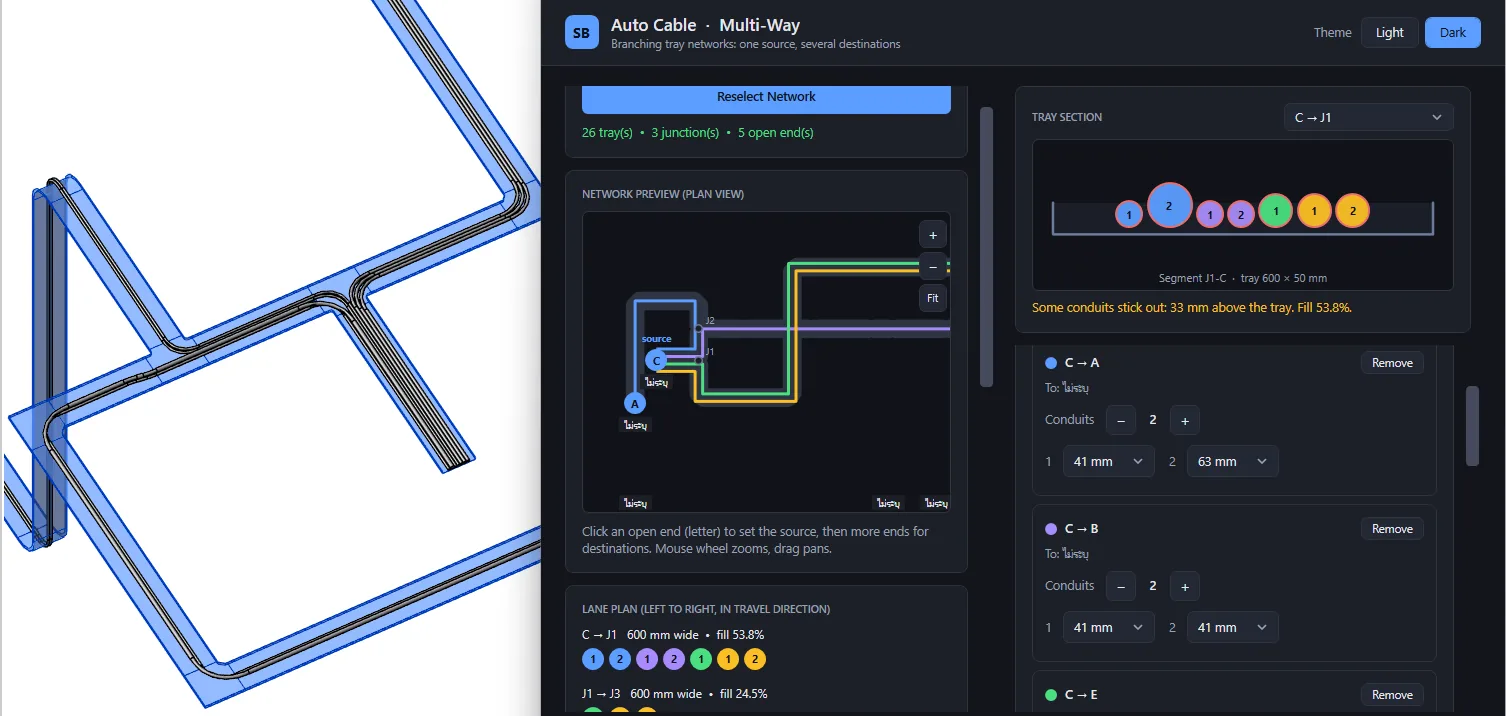
Click the tray where the cables start. The tool reads the connected tray network and shows a preview: every open end gets a letter (A, B, C...) and every junction a number (J1, J2...).
Choose the destinations from the letters and set how many conduits each route needs and their size. The window checks the list and tells you what will be created before anything is drawn.
Real run in Revit: three routes from one source, two 4" conduits each. Left: the conduits created along the trays, with bends and branches. Right: the Auto Cable window after "Create All Routes".ผลจริงใน Revit: 3 เส้นทางจากต้นทางเดียว เส้นละ 2 ท่อ 4" ซ้ายคือท่อที่สร้างตามราง พร้อมข้อโค้งและจุดแยก ขวาคือหน้าต่าง Auto Cable หลังกด Create All Routes
// YOU_SET
Conduit type, count and size per routeชนิดท่อ จำนวน และขนาดของแต่ละเส้นทาง
Gap between conduits 25 / 50 / 75 / 100 mmระยะห่างระหว่างท่อ
Alignment on the tray LEFT / CENTER / RIGHTจัดแนวท่อบนราง ชิดซ้าย กลาง หรือชิดขวา
Clearance from the tray edgeระยะเว้นจากขอบราง
Lift above the tray floorระยะยกท่อจากพื้นราง
// YOU_GET
All routes in one run, e.g. 3 routes · 6 conduitsได้ทุกเส้นทางในครั้งเดียว เช่น 3 เส้นทาง 6 ท่อ
Real Revit conduits along the trays, with bends and branches placed for youได้ท่อ Conduit จริงใน Revit วิ่งตามราง พร้อมข้อโค้งและจุดแยกที่วางให้อัตโนมัติ
Even spacing, so the run is neat and easy to checkระยะห่างสม่ำเสมอ งานเป็นระเบียบ ตรวจง่าย
Changed your mind? One Ctrl+Z undoes the whole runไม่ถูกใจ กด Ctrl+Z ครั้งเดียวย้อนได้ทั้งหมด